
 No products in the cart.
VStarcam Ultra App | Wi-Fi & 4G Network Setup Guide
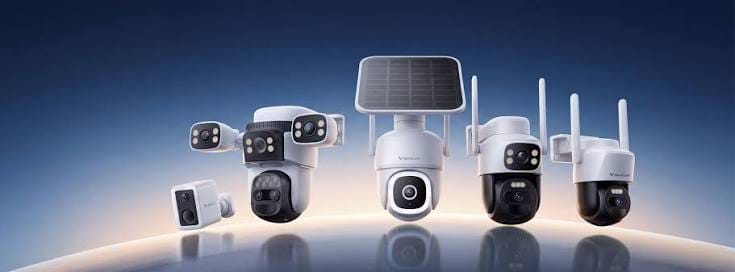
Setting up your VStarcam security camera is easy. Whether you have a WiFi CCTV camera, outdoor camera, 4G camera, battery camera, or multi-lens security camera, this guide will help you get your camera connected and ready for remote monitoring.
VStarcam cameras are designed for homes, offices, shops, warehouses, farms, and other security applications. Depending on the model, features may include remote viewing, night vision, motion or human detection, two-way audio, PTZ control, smart alerts, cloud storage, and local memory-card recording.
Watch the VStarcam Camera Setup Video
Follow our step-by-step video guide to learn how to connect and configure your WiFi & 4G VStarcam camera.
VStarcam Installation & Setup Video:
For the best results, keep your camera, power adapter, smartphone, and WiFi or 4G connection ready before starting.
Before You Start
Before installing your VStarcam camera, make sure you have:
- Your VStarcam camera
- Power adapter or charged battery, depending on the model
- Smartphone or tablet
- Stable internet connection for WiFi models
- Active SIM card and suitable mobile network for 4G models
- MicroSD/TF memory card, if local recording is required
- VStarcam mobile application
- Camera QR code or device information
Important: Setup options can vary between VStarcam models. Always check the product manual and specifications for your particular camera.
Step 1: Power On Your VStarcam Camera
Connect the camera to its power supply or switch it on if it is a battery-powered model.
Allow the camera a few moments to start. Depending on the model, you may hear a voice prompt or see an indicator showing that the camera is ready for setup.
For a camera that has previously been configured, you may need to reset it before connecting it to a new account or WiFi network.
Step 2: Install the VStarcam App
Install the recommended VStarcam mobile application on your smartphone.
Many current VStarcam models use the O-KAM Pro app for device setup and remote monitoring. However, app compatibility can vary by model, so always use the application specified for your camera.
Once the app is installed:
- Open the app.
- Create an account or sign in.
- Allow the required permissions.
- Make sure your phone is connected to the internet.
- Proceed to add your camera.
Step 3: Connect Your Camera
WiFi Camera Setup
For WiFi models, connect your smartphone to the WiFi network you want the camera to use.
Open the VStarcam app and select the option to Add Device.
Follow the instructions shown in the application. Depending on the camera model, you may be asked to:
- Scan the camera’s QR code.
- Scan a QR code displayed on your phone.
- Enter WiFi details.
- Connect the camera to your wireless network.
Keep the camera and smartphone reasonably close to the WiFi router during the initial setup.
Important WiFi Tip
If your camera only supports a specific WiFi band, make sure your phone and camera are using a compatible network during setup. Check the individual product specifications before installation.
Step 4: 4G Camera Setup
VStarcam also offers 4G security cameras designed for locations where a conventional WiFi connection may not be available.
For a 4G camera:
- Insert a compatible SIM card.
- Make sure the SIM has an active data package.
- Power on the camera.
- Wait for the camera to connect to the mobile network.
- Open the VStarcam application.
- Add the camera by following the model-specific instructions.
4G camera setup can vary depending on the model and supported mobile network bands, so check the product specifications before purchasing or installing a 4G camera.
Step 5: Add the Camera to the App
After establishing the network connection, add the camera to your VStarcam account.
Depending on the model, the application may allow you to add the device by scanning a QR code or using the camera’s device information.
Once successfully added, the camera should appear in your device list.
Tap the camera to access the live video feed.
Step 6: Configure Camera Settings
After connecting your camera, review the available settings.
Common options may include:
Video Settings
Adjust available video quality, resolution, and other image settings according to your requirements.
Night Vision
Configure infrared or available color night-vision options depending on the camera model.
Motion & Human Detection
Enable detection features when you want the camera to monitor movement and send alerts.
Notifications
Enable push notifications so you can receive alerts when supported detection features are triggered.
Two-Way Audio
If your camera supports two-way audio, use the microphone and speaker controls in the app to communicate through the camera.
PTZ Control
For supported pan-tilt cameras, use the app to remotely adjust the viewing direction.
Step 7: Install the Camera in the Correct Location
Once the camera is working correctly, choose its permanent installation location.
Indoor Cameras
Indoor VStarcam cameras can be installed in areas such as:
- Living rooms
- Entrances
- Offices
- Shops
- Reception areas
- Baby monitoring areas
- Pet monitoring areas
Position the camera so that the important area is clearly visible and avoid pointing it directly toward strong light sources.
Outdoor Cameras
Outdoor cameras should be installed in a suitable position with a clear view of the area you want to monitor.
Depending on the model, outdoor VStarcam cameras may provide weather-resistant construction, night vision, PTZ functionality, human detection, and other outdoor surveillance features.
Use the supplied mounting hardware and follow the installation instructions provided with your specific model.
Step 8: Install a MicroSD Card for Local Recording
If your VStarcam model supports a MicroSD/TF card, you can use it for local video recording.
Before inserting a memory card:
- Check the maximum supported capacity for your camera.
- Use a suitable, reliable memory card.
- Insert the card according to the camera’s instructions.
- Format the card through the app if required.
- Configure your preferred recording settings.
Memory-card capacity and supported storage options vary between models.
Some VStarcam cameras may also support cloud storage or other recording options depending on the model.
Step 9: Test Your Camera
Before completing the installation, test all important functions.
Check:
- Live video
- Daytime image quality
- Night vision
- Motion detection
- Human detection, if supported
- Push notifications
- Two-way audio
- PTZ movement, if supported
- Recording
- Memory-card storage
- Remote viewing
Walk through the monitored area to confirm that detection and notifications are working as expected.
Common VStarcam Setup Problems
Camera Will Not Connect to WiFi
Try the following:
- Check your WiFi password.
- Move the camera closer to the router.
- Confirm that your camera supports the WiFi network being used.
- Restart the camera and router.
- Reset the camera and try the setup again.
Camera Is Offline
Check:
- Internet connection
- Camera power supply
- WiFi signal strength
- SIM/data connection for 4G models
- Network settings in the app
QR Code Will Not Scan
Make sure:
- Your phone brightness is sufficiently high.
- The camera lens is clean.
- The QR code is displayed clearly.
- The phone is held at an appropriate distance from the camera.
- You are following the correct setup procedure for your model.
No Notifications
Check that:
- Motion or human detection is enabled.
- Push notifications are enabled in the VStarcam app.
- Notifications are allowed in your phone settings.
- Detection areas and sensitivity are configured correctly.
Camera Is Not Recording
Check whether:
- A compatible MicroSD/TF card is installed.
- The card has been detected by the camera.
- The card has been formatted correctly.
- Recording has been enabled.
- The storage card has sufficient space.
Resetting a VStarcam Camera
If your camera was previously connected to another WiFi network or account, you may need to reset it before setting it up again.
Locate the Reset button on your camera and follow the instructions provided in the product manual.
Do not reset the camera unless necessary, as resetting may remove existing network or configuration settings.
Need Help Setting Up Your VStarcam Camera?
If you are having difficulty installing or configuring your VStarcam camera, first check the product-specific manual and setup instructions.
For additional assistance, contact VStarcam Pakistan Support with:
- Camera model
- Order number, if applicable
- Description of the problem
- Screenshot or photo of the error
- Short video of the issue, if necessary
VStarcam Pakistan Support
📍 Head Office: 379A, R1 Block, Johar Town, Lahore, Pakistan
📧 Email: support@vstarcam.pk
📱 WhatsApp: 0346 3448899
We can help with camera setup, app configuration, connectivity issues, and general troubleshooting.
VStarcam Installation & Setup FAQs
Do I need professional installation for a VStarcam camera?
Many VStarcam WiFi and battery cameras can be installed and configured by the user. Professional installation may be recommended for higher outdoor installations, complex surveillance requirements, or multiple-camera systems.
Which app is used for VStarcam cameras?
The required application depends on the camera model. Many current VStarcam models use O-KAM Pro. Always check your camera’s product page or manual for the correct app.
Can I view my VStarcam camera remotely?
Yes, supported VStarcam cameras can be accessed remotely through the compatible mobile application when the camera has an active network connection.
Can VStarcam cameras record without the internet?
This depends on the camera model and recording method. Cameras supporting local MicroSD/TF storage may be able to record locally, while remote viewing and cloud-based functions generally require an internet connection.
Can I use a VStarcam camera outdoors?
Yes. VStarcam offers dedicated outdoor models. Always check the individual product’s weather-resistance rating and installation requirements before installing it outside.
Get Your VStarcam Camera Ready
A correctly installed and configured camera provides better surveillance, more reliable notifications, and easier remote monitoring.
Explore the VStarcam camera range at VStarcam Pakistan and choose the right camera for your home, office, shop, warehouse, or outdoor security requirements.
Need help? Contact VStarcam Pakistan Support for installation and setup assistance.